
Blue Holidays Quilt-Along Day 2
Walking in a Winter Wonderland...
Sew a wintry lap quilt in gorgeous blue and silver holiday prints!
We'll be spending the next two weeks sharing the Blue Holidays Quilt-Along with you! This cozy lap quilt features our wintry Blue Holidays collection--perfect to use all winter long!
Follow along as we reveal the quilt row by row and make it yourself to snuggle under all winter long. The finished quilt measures 60" x 68" and features five different pieced blocks.
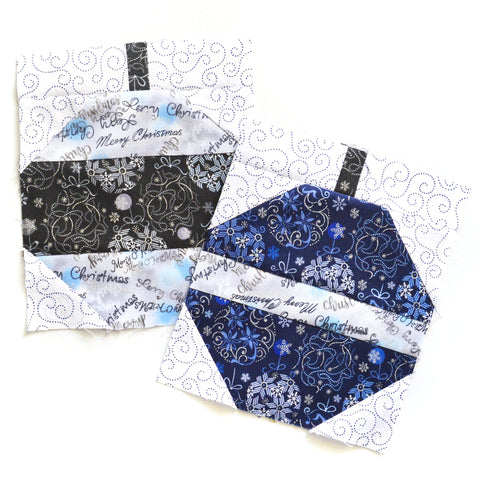
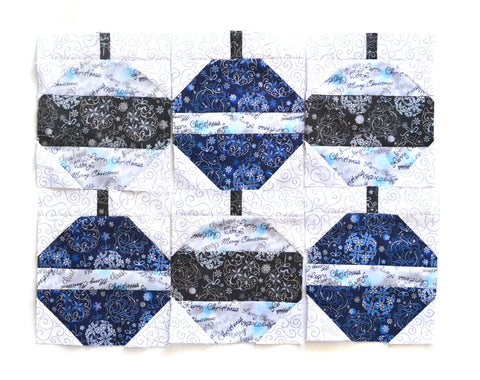
Today we're sharing the tutorial for the Ornament Block. You'll need to make six of these blocks--feel free to experiment on the piecing to make more intricate ornaments. We'll talk block row assembly on Day 6.
Ornament Block
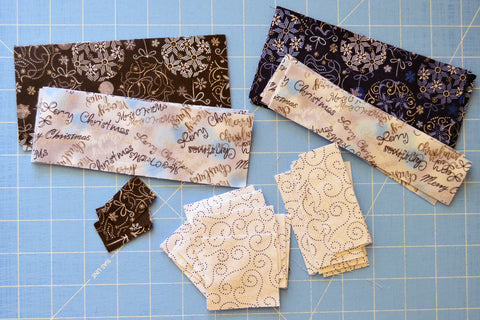
You’ll Need:
(to make 6 blocks)
¼ yard Navy Ornament print
¼ yard Gray Ornament print
¼ yard Silver Text print
¼ yard White Filigree print
Cutting:
From the Navy Ornament:
(1) 3” x WOF strip; subcut into (6) 3” x 6-1/2” pieces
From the Gray Ornament:
(1) 3” x WOF strip; subcut into (3) 3” x 6-1/2” pieces and (6) 1” x 1-1/2” pieces
From the Silver Text:
(1) 2-1/4” x WOF strip; subcut into (6) 2-1/4” x 6-1/2” pieces
(1) 1-1/2” x WOF strip; subcut into (3) 1-1/2” x 6-1/2” pieces
From the White Filigree:
(2) 2-1/4” x WOF strips; subcut into (24) 2-1/4” squares
(1) 1-1/2” x WOF strip; subcut into (12) 1-1/2” x 3-1/4” pieces
Make the Blocks:
Step 1 Sew 1-1/2” x 3-1/4” White Filigree pieces to opposite sides of (1) 1” x 1-1/2” Gray Ornament piece to make an ornament top. Make a total of (6) ornament tops.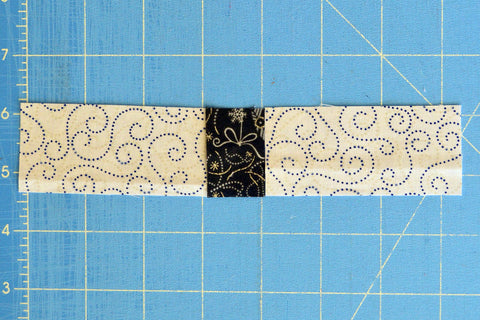
Step 2 Lay out 2-1/4” x 6-1/2” Silver Text pieces lengthwise on opposite sides of (1) 3” x 6-1/2” Gray Ornament piece. Make a total of (3) gray ornament squares.
Note: If you want to customize your ornaments, each one should measure 6-1/2" square before adding the corners and tops. 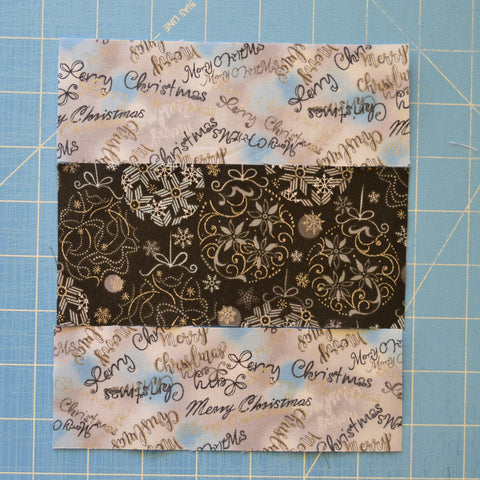
Step 3 Draw a diagonal line on the wrong side of (4) 2-1/4” White Filigree squares. Position a marked square on the upper left corner of a gray ornament square. Sew on the drawn line, trim seam allowance to ¼”, and press open.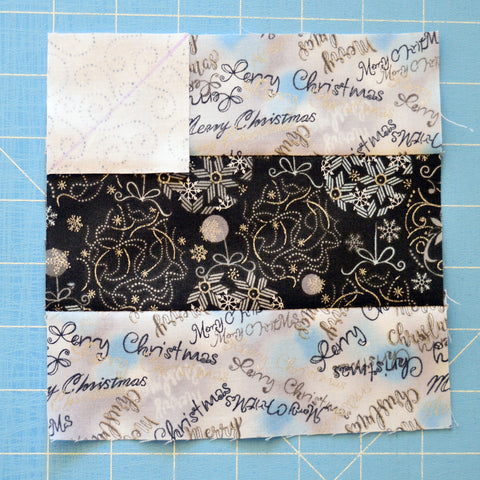
Step 4 Repeat on the remaining (3) corners to make the ornament body unit. Add corners to all gray ornament squares.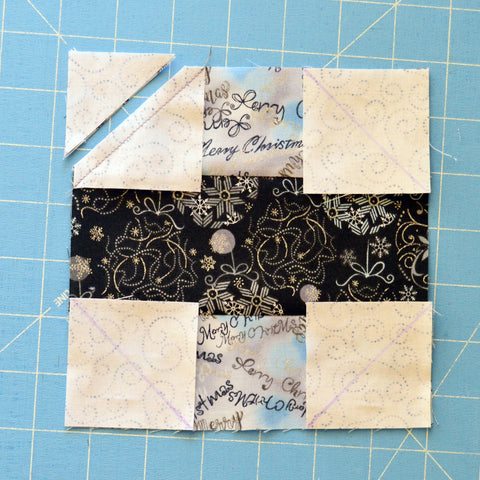
Step 5 Stitch an ornament top to each gray ornament body unit.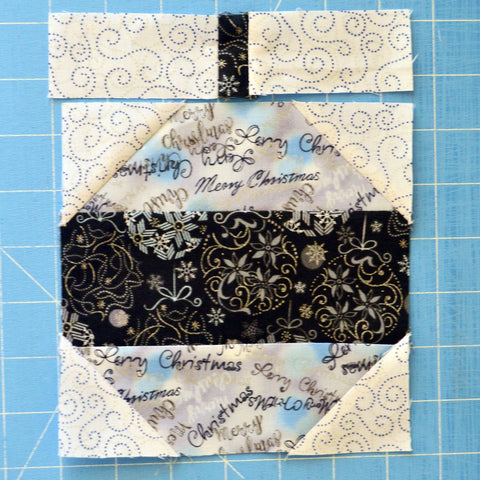
Step 6 Lay out 3” x 6-1/2” Navy Ornament pieces lengthwise on opposite sides of (1) 1-1/2” x 6-1/2” Silver Text piece. Make a total of (3) navy ornament squares.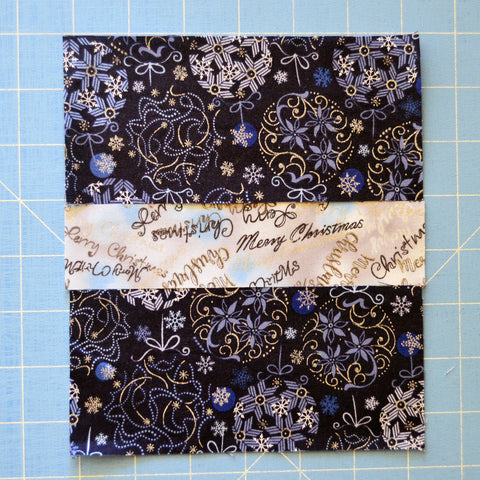
Step 7 As in steps 3 and 4, use 2-1/4” White Filigree squares to all (4) corners of each navy ornament square.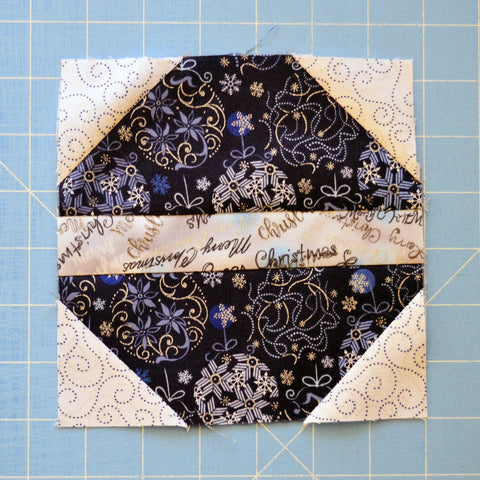
Step 8 Stitch an ornament top to each navy ornament body unit. You now have (6) ornament blocks!
See the entire Blue Holidays fabric collection here and ask for it at your local quilt shop.
Blue Holidays Quilt-Along
Day 1 - Star Block #1
Day 3 - Star Block #2
Day 4 - Present Block
Day 5 - Star Block #3
Day 6 - Quilt Assembly